Creating Shortcuts
Create consistent shortcuts and Start-menu groups so common analyst tools can be opened quickly without searching through installation directories. Keep the tool names and locations aligned with the corresponding SUSA guides.
Administrator shortcuts
An administrator shortcut starts every command with elevated privileges. Use it only when a documented task requires elevation; use a standard shell for ordinary file review and note which privilege level was used.
Create desktop and Start-menu shortcuts
Create desktop shortcuts
Creating Admin Command Prompt Shortcut
Right-click Desktop → New → Shortcut
In location, enter:
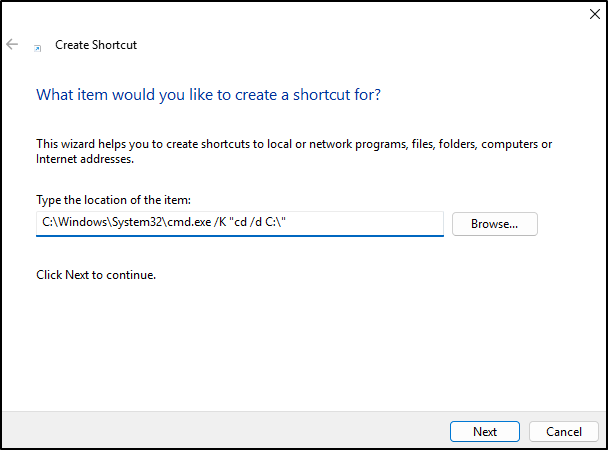
Click Next and name it:
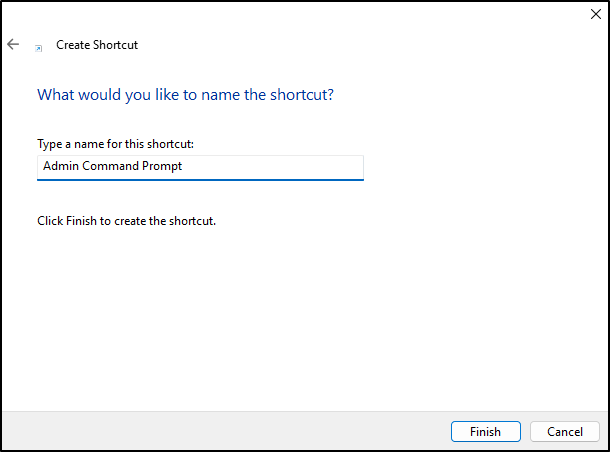
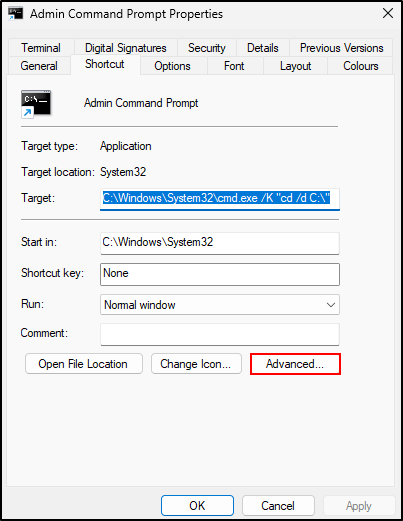
Click Finish. Right-click the new shortcut → Properties.
Go to Shortcut tab → Advanced
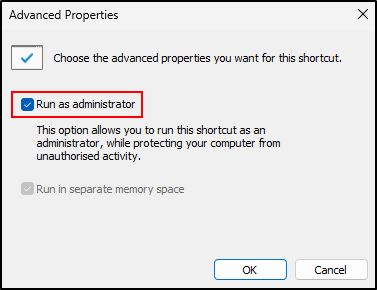
Tick Run as administrator and click OK.
Click Apply then OK.
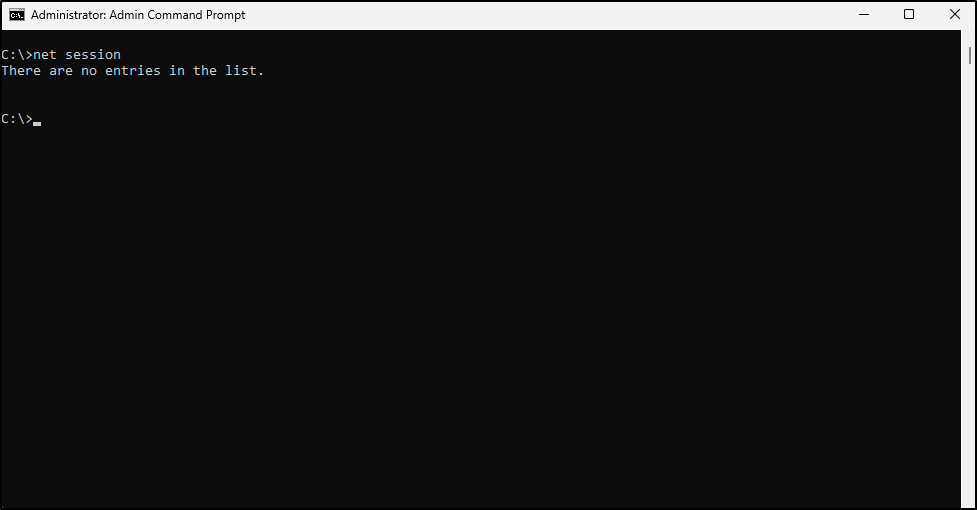
Double-click the shortcut and verify that command prompt is running as administrator.
Run the command net session. If running as administrator, the command will run successfully.
Creating Admin PowerShell Prompt Shortcut
Right-click Desktop → New → Shortcut
In location, enter:
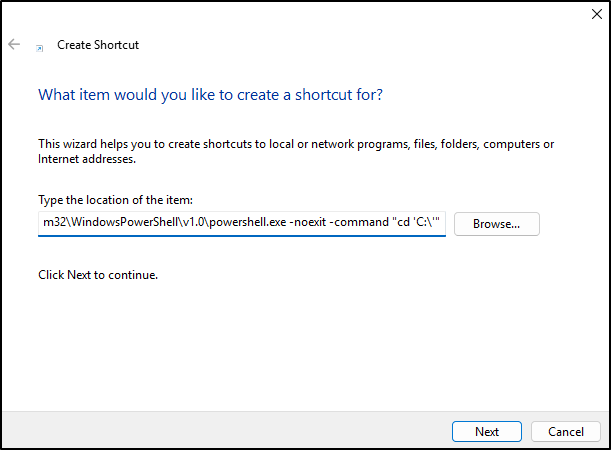
Click Next and name it:
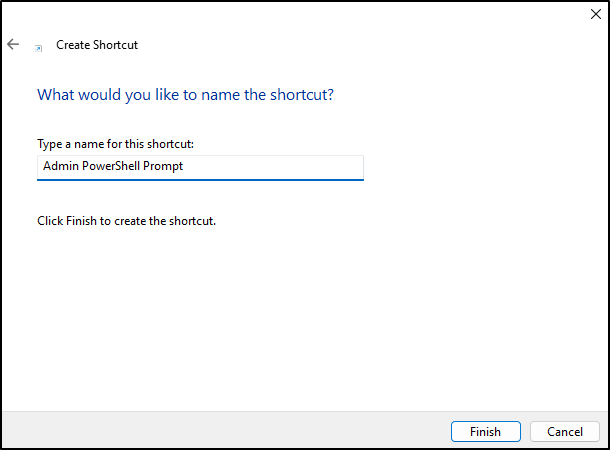
Click Finish.
Right-click the new shortcut → Properties.
Go to Shortcut tab → Advanced
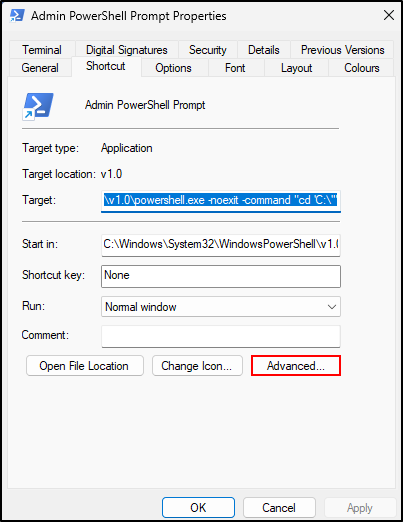
Tick Run as administrator and click OK.
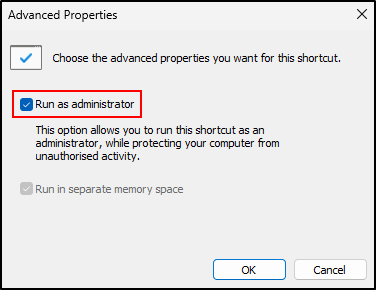
Click Apply then OK.
Double-click the short and verify that command prompt is running as administrator by running the following command:
([Security.Principal.WindowsPrincipal] [Security.Principal.WindowsIdentity]::GetCurrent()).IsInRole([Security.Principal.WindowsBuiltInRole]::Administrator)
True means it is running as administrator.
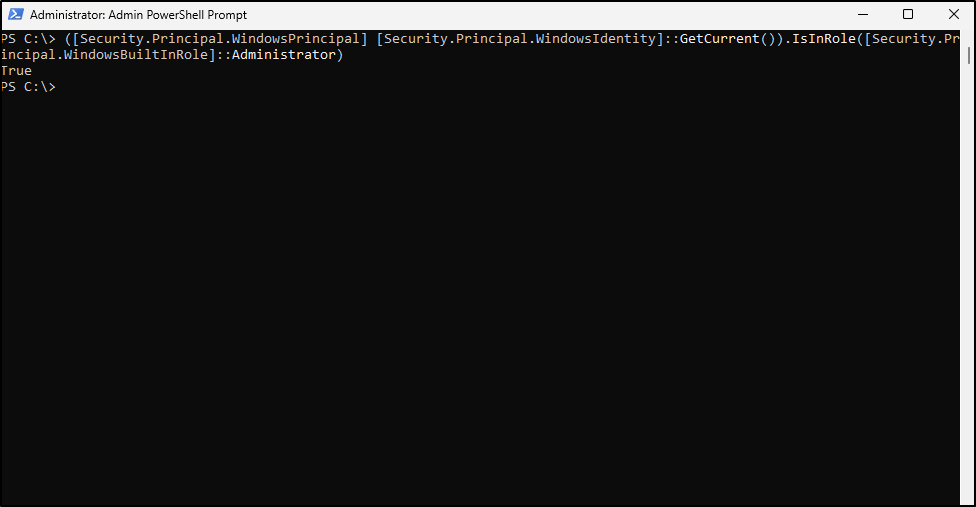
You can click the shortcuts and drag and drop them to the taskbar to pin it to the taskbar.

Create Start-menu groups
The idea is to create a shortcut of commonly used tools in the start menu and group them together by category.
Later after categorising
Evidence Tools
For Evidence Tools, we will group the following tools: Browsing History View, ShadowExplorer, PhotoRec GUI, Bulk Extractor with Record Carving, ShellBags Explorer (EZ Tools), thumbs_viewer, thumbcache_viewer, PEStudio, JumpList Explrer (EZ Tools), SDBExplorer (EZ Tools), Hasher (EZ Tools), and the entire folder of Zimmerman Tools.
Right-click BrowsingHistoryView (located in C:\Tools\browsinghistoryview in my case), and click Pin to Start.
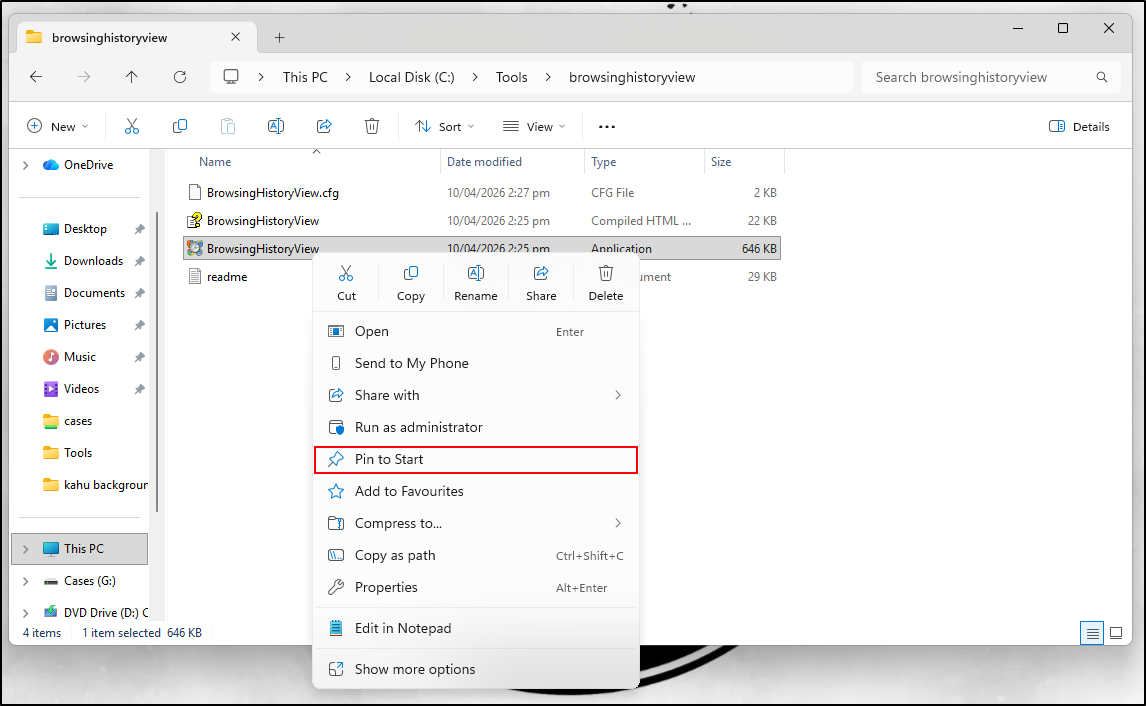
This will pin the BrowingHistoryView to the Start Menu. Click Windows icon, right-click BrowsingHistoryView and click Create a new app folder.
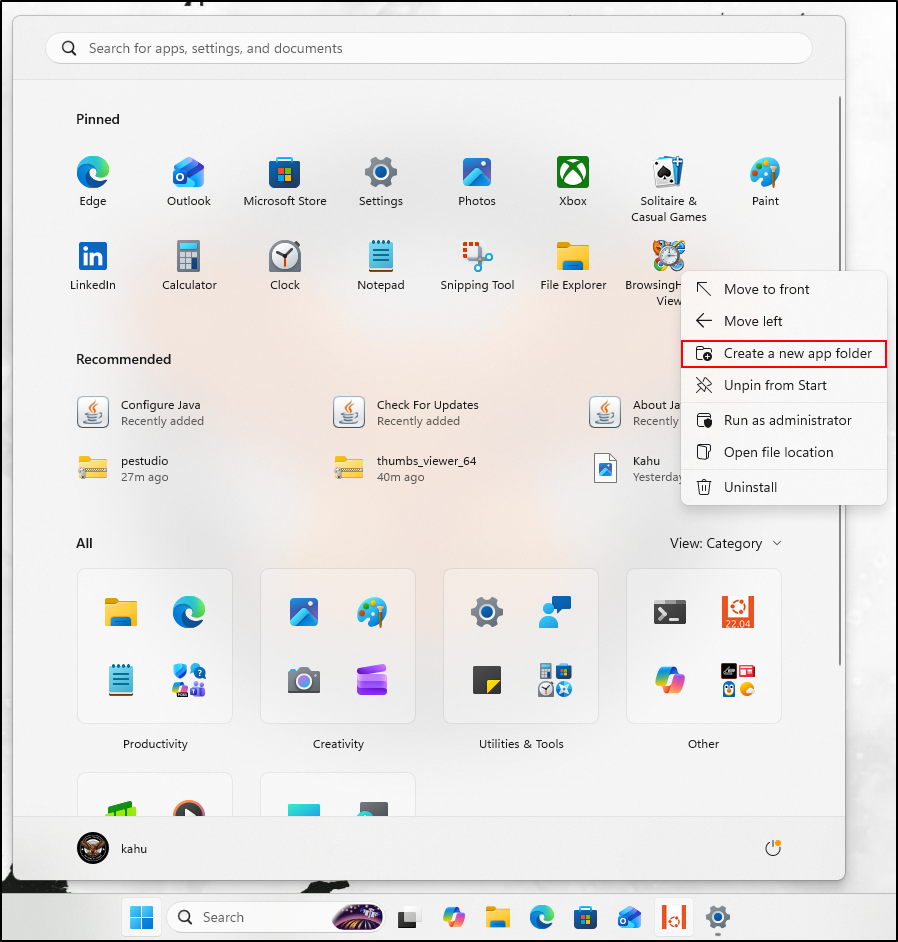
Click the new app folder and rename it to Evidence Tools.
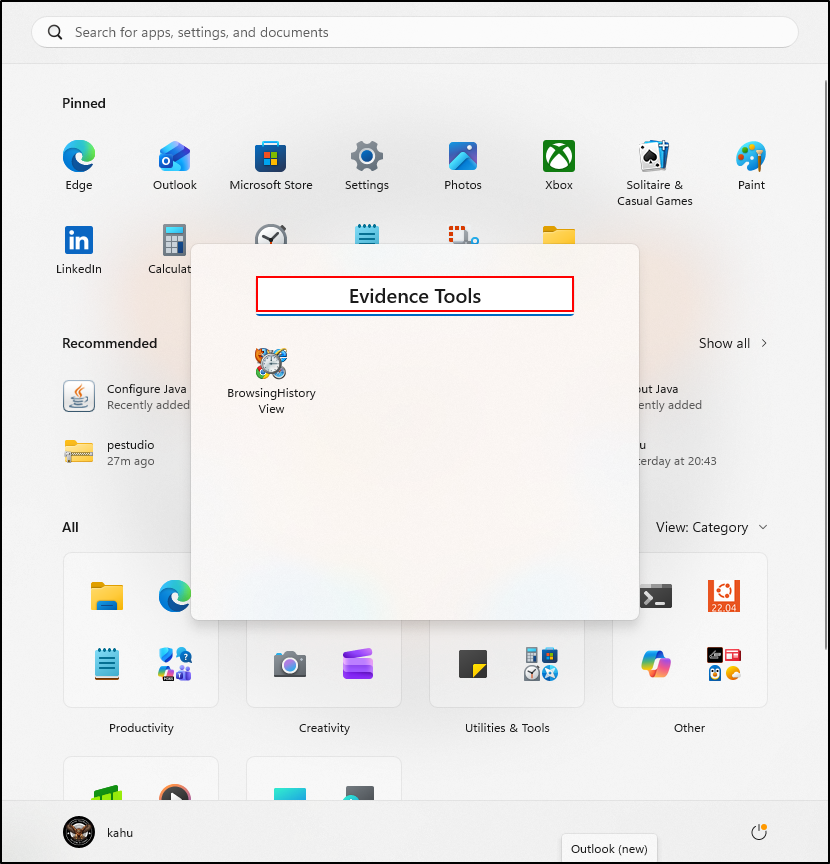
Repeat the same process for other tools and move them to the Evidence Tools folder.
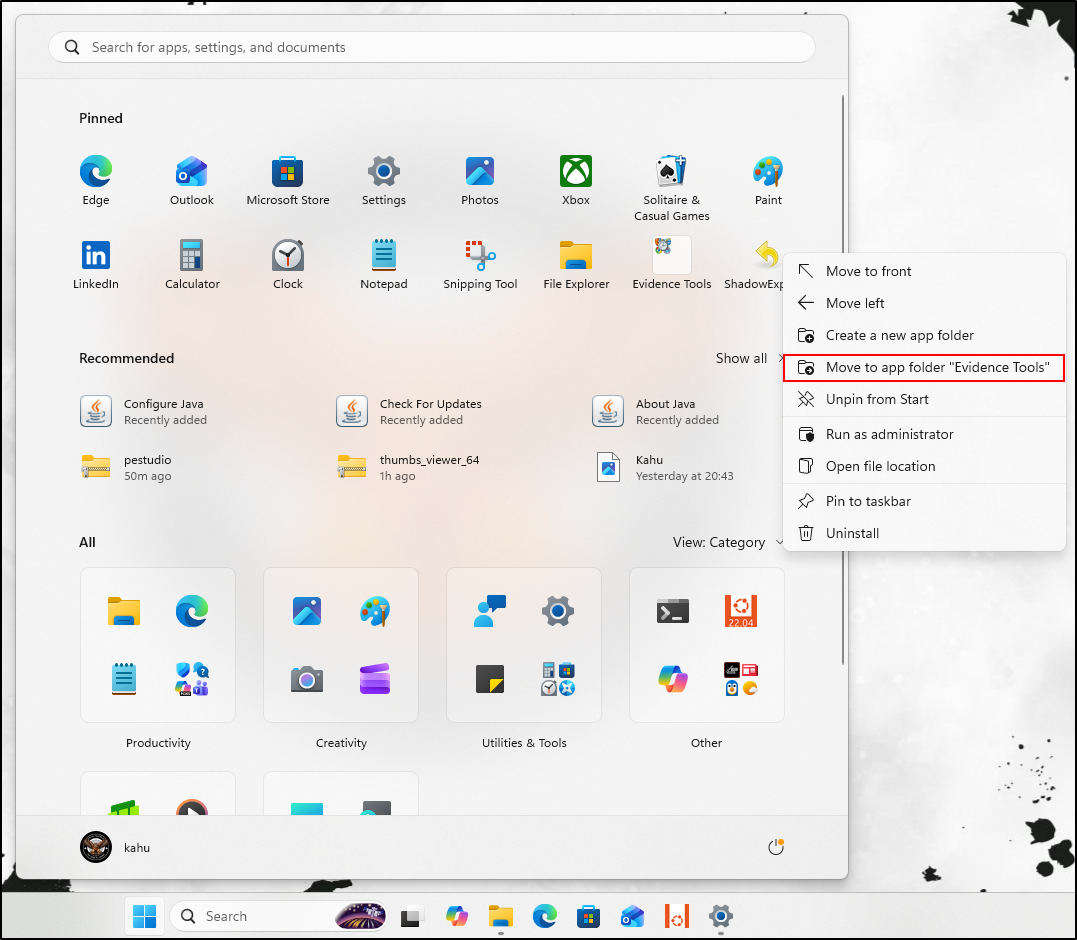
The end result should look similar to the screenshot.
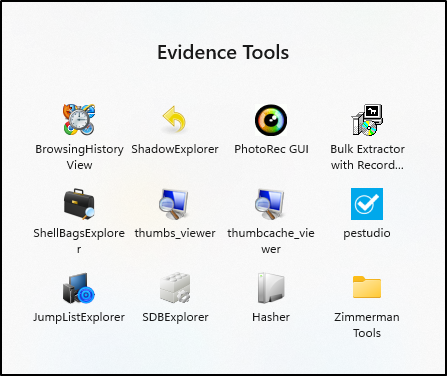
Collection Tools
For Evidence Tools, group gkape, Arsenal Image Mounter and FTK Imager.
Referencing the steps above, pin the tools to the Start menu and group them in the custom app folder called Collection Tools. The end result should look similar to the screenshot.
Email Tools
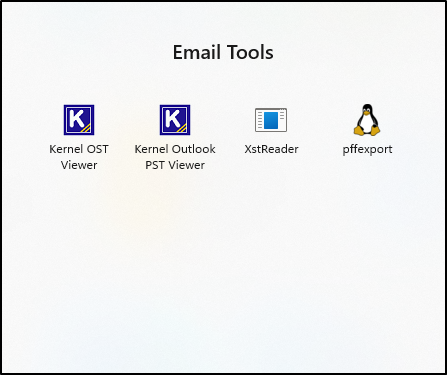
For Email Tools, group Kernel OST Viewer, Kernel Outlook PST Viewer, XstReader and pffexport.
Referencing the steps above, pin the tools to the Start menu and group them in the custom app folder called Email Tools. The end result should look similar to the screenshot.
NTFS Tools
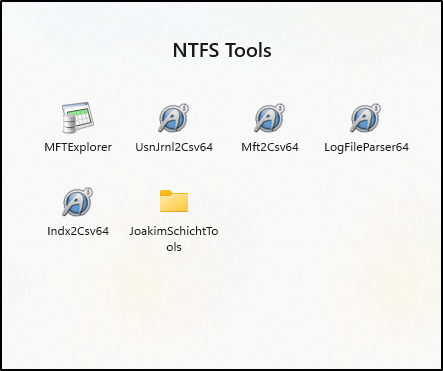
For NTFS Tools, group MFTExplorer, UsnJrnl2Csv64, Mft2Csv64, LogFileParser64, Indx2Csv64 and JoakimSchichtTools.
Referencing the steps above, pin the tools to the Start menu and group them in the custom app folder called NTFS Tools. The end result should look similar to the screenshot.
Sysinternals Tools
For Sysinternals Tools, group the following tools: Autoruns64, Diskmon, DiskView64, procexp64, Procmon64, RDCMan, ShareEnum64, tcpview64, vmmap64, ZoomIt64 and Sysinternals Suite folder.
Referencing the steps above, pin the tools to the Start menu and group them in the custom app folder called Sysinternals Tools. The end result should look similar to the screenshot.