Maldump
What Maldump does
Guided SUSA tool journey
Maldump supports malware analysis. In this guide, you will use it to extract a selected suspicious process or region from a supplied training image. The procedure and screenshots provide the practical reference; the surrounding context explains what to record and how to judge the result.
Tool guide at a glance
Extract a selected suspicious process or region from a supplied training image.
An inert or purpose-built training sample stored in a disposable isolated analysis VM.
A static observation or capability finding with sample hash, tool output, and confidence statement.
Evidence and safety
Do not execute unknown samples on SUSA. Disable shared folders and credentials, and use only authorised training material. Record the input identifier, tool version, relevant commands or settings, time and time zone, output location, and any errors or limitations as you work.
Choose your journey
01Understand the evidenceLearn the malware analysis concepts and limitations.Complete when you can explain what the evidence can and cannot show.Beginner · No tool required · 15–25 min 02Follow the Maldump guideWork through the commands, screenshots, and instructional sequence below.Complete when the documented workflow produces its expected output.Guided · SUSA workstation · Time varies 03Interactive labPractise the tool workflow in a safe browser simulation.Complete when the guided result is supported by the case evidence.Beginner · Browser only · 10–20 min 04Full LabInvestigate an authorised training scenario with fewer prompts and preserve a reviewable result.Complete when another analyst can reproduce and verify the outcome.Intermediate · Isolated lab · 45–90 min
How the labs complement this guide
The Interactive Lab is a safe browser simulation for practising the workflow and validation logic. The Full Lab is an independent exercise for an isolated, authorised environment. Confirm the installed tool version and expected output before relying on either exercise in a real case.
Accessing Maldump in SUSA
Maldump makes it easy to extract quarantined files of multiple AVs from a live system or a mounted disk image.
Install PDM
PDM is a modern Python package and dependency manager supporting the latest PEP standards.
Use a disposable analysis environment
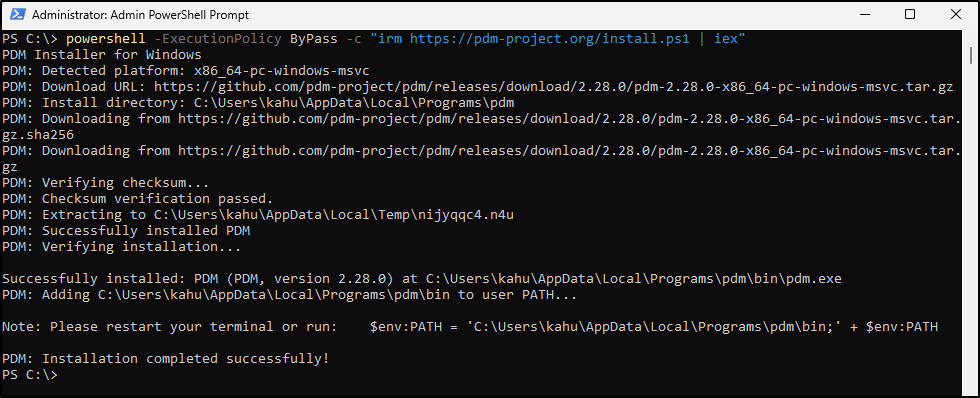
This command downloads and immediately executes an internet-hosted installation script. Run it only in an authorised, disposable build or analysis VM, never on original evidence or a production endpoint. Review the script at the official PDM project before execution, take a VM snapshot and record the installed version.
Open an administrator PowerShell prompt and run the following command:
Install Visual Studio Build Tools for C++
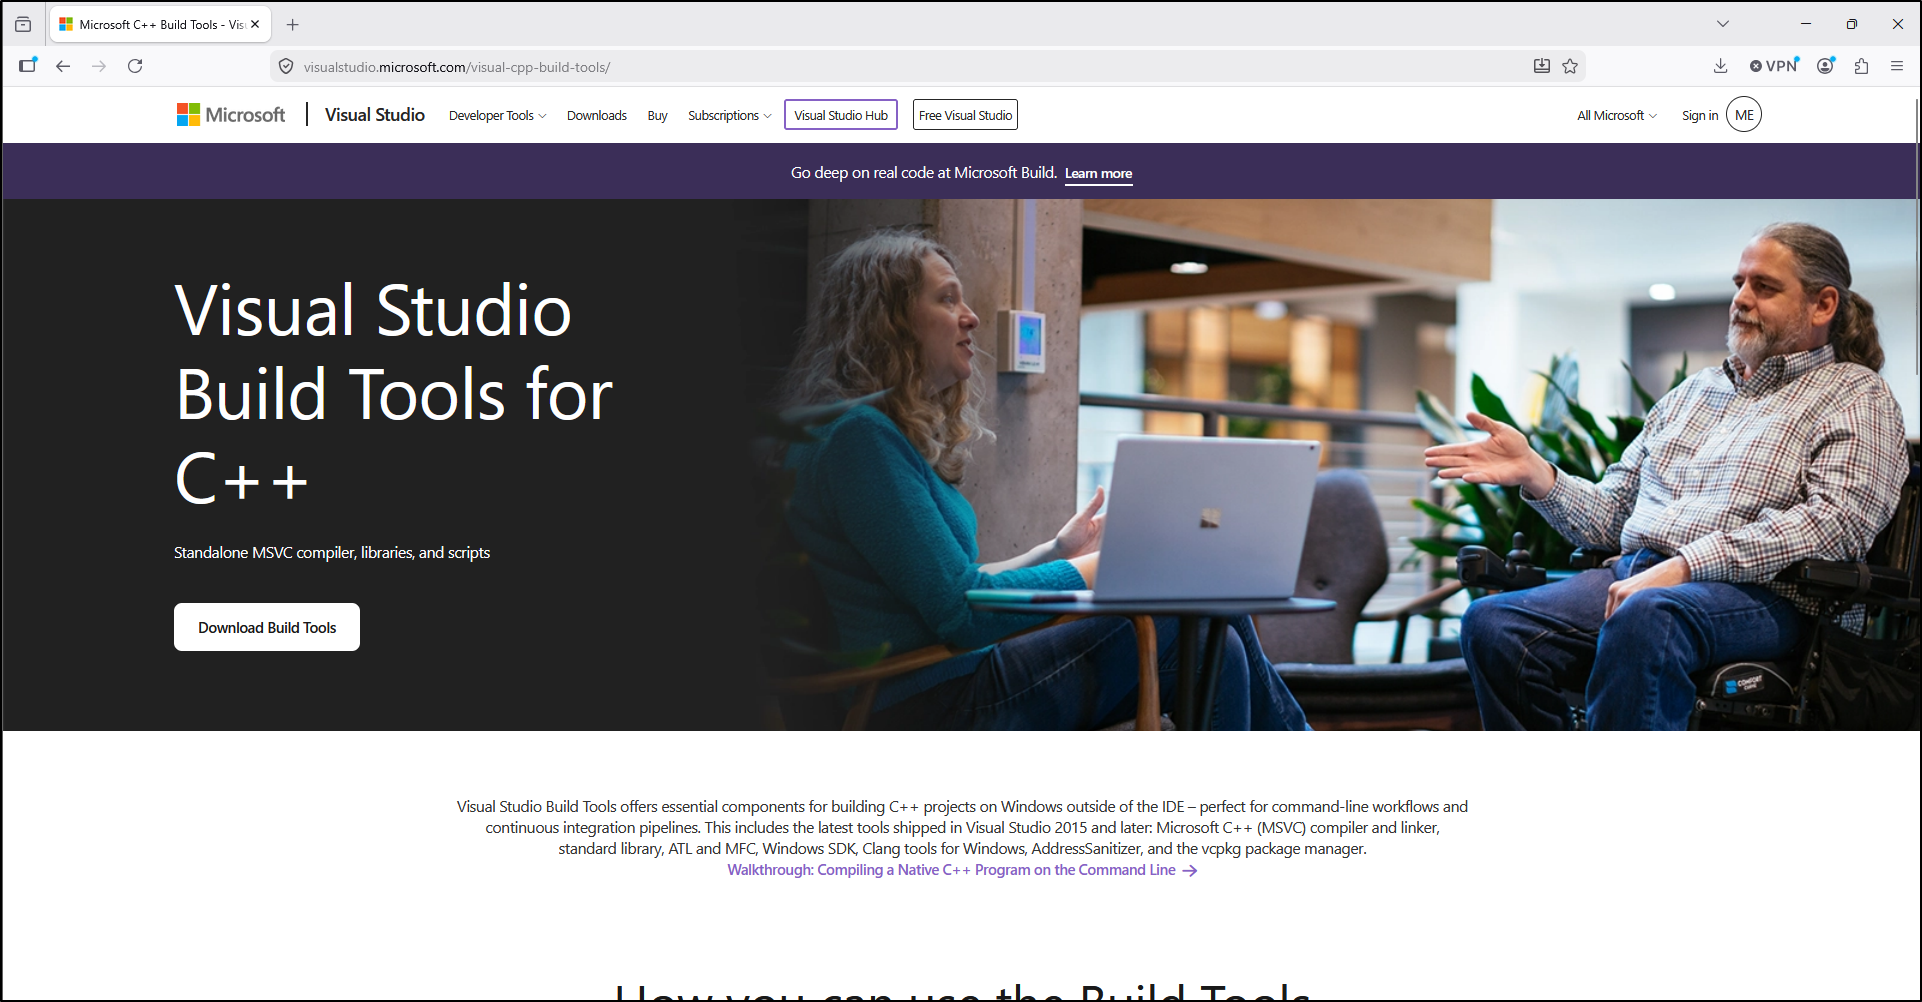
Download Visual Studio Build Tools for C++.
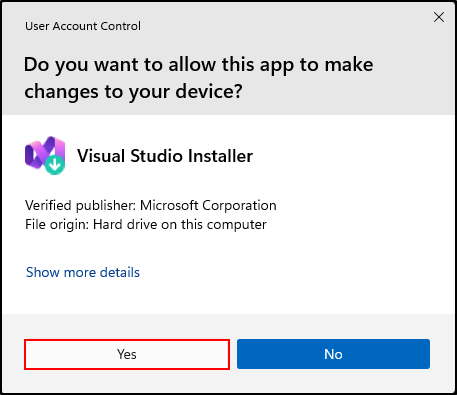
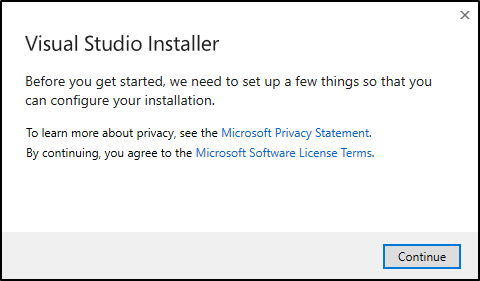
Open the downloaded executable and click Yes to install.
Click Continue.
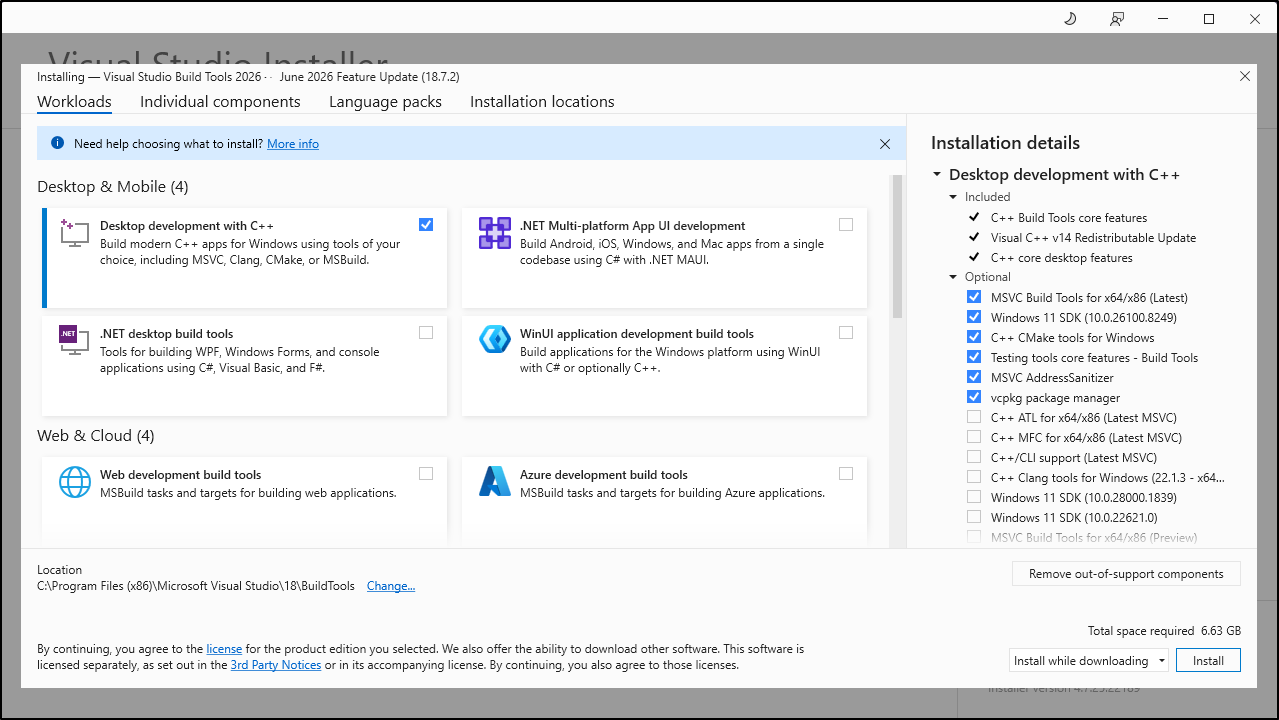
Select Desktop development with C++ and click Install.
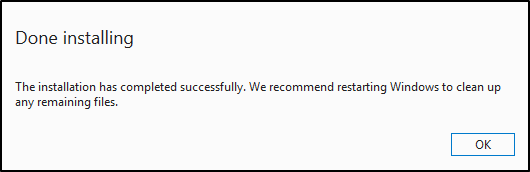
Once the installation is complete, click OK and restart Windows.
Install Maldump
Open an administrator Command Prompt and run the following command to install Maldump:
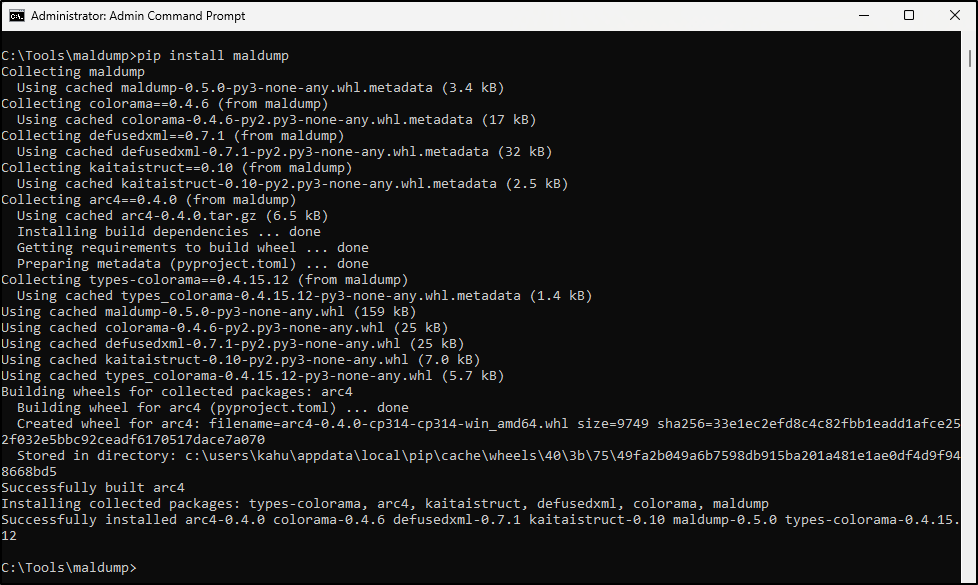
Alternatively, navigate to C:\Tools and run the following commands to install Maldump:
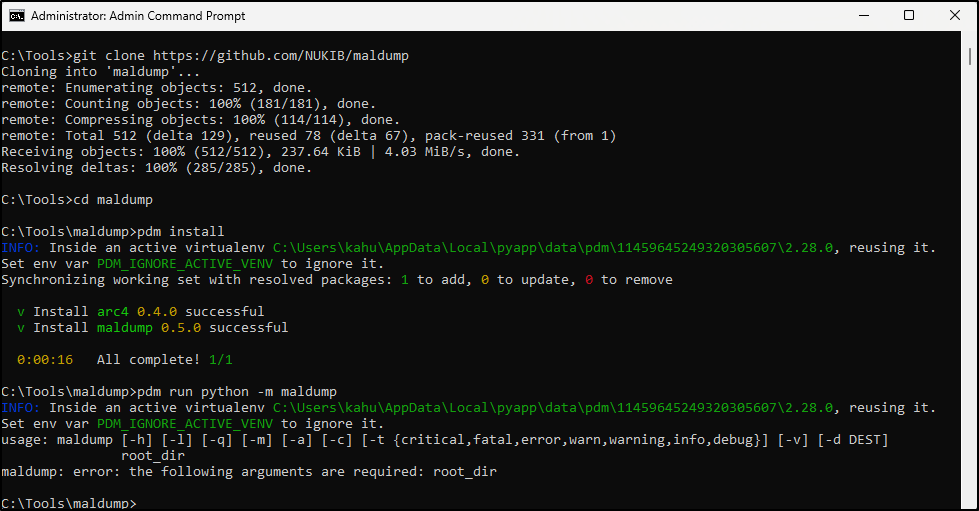
Testing Maldump
List quarantine files located on disk C
Dump quarantine files from disk C into archive quarantine.tar
Export quarantine metadata from disk C into quarantine.csv
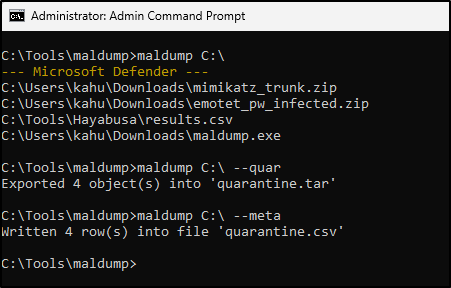
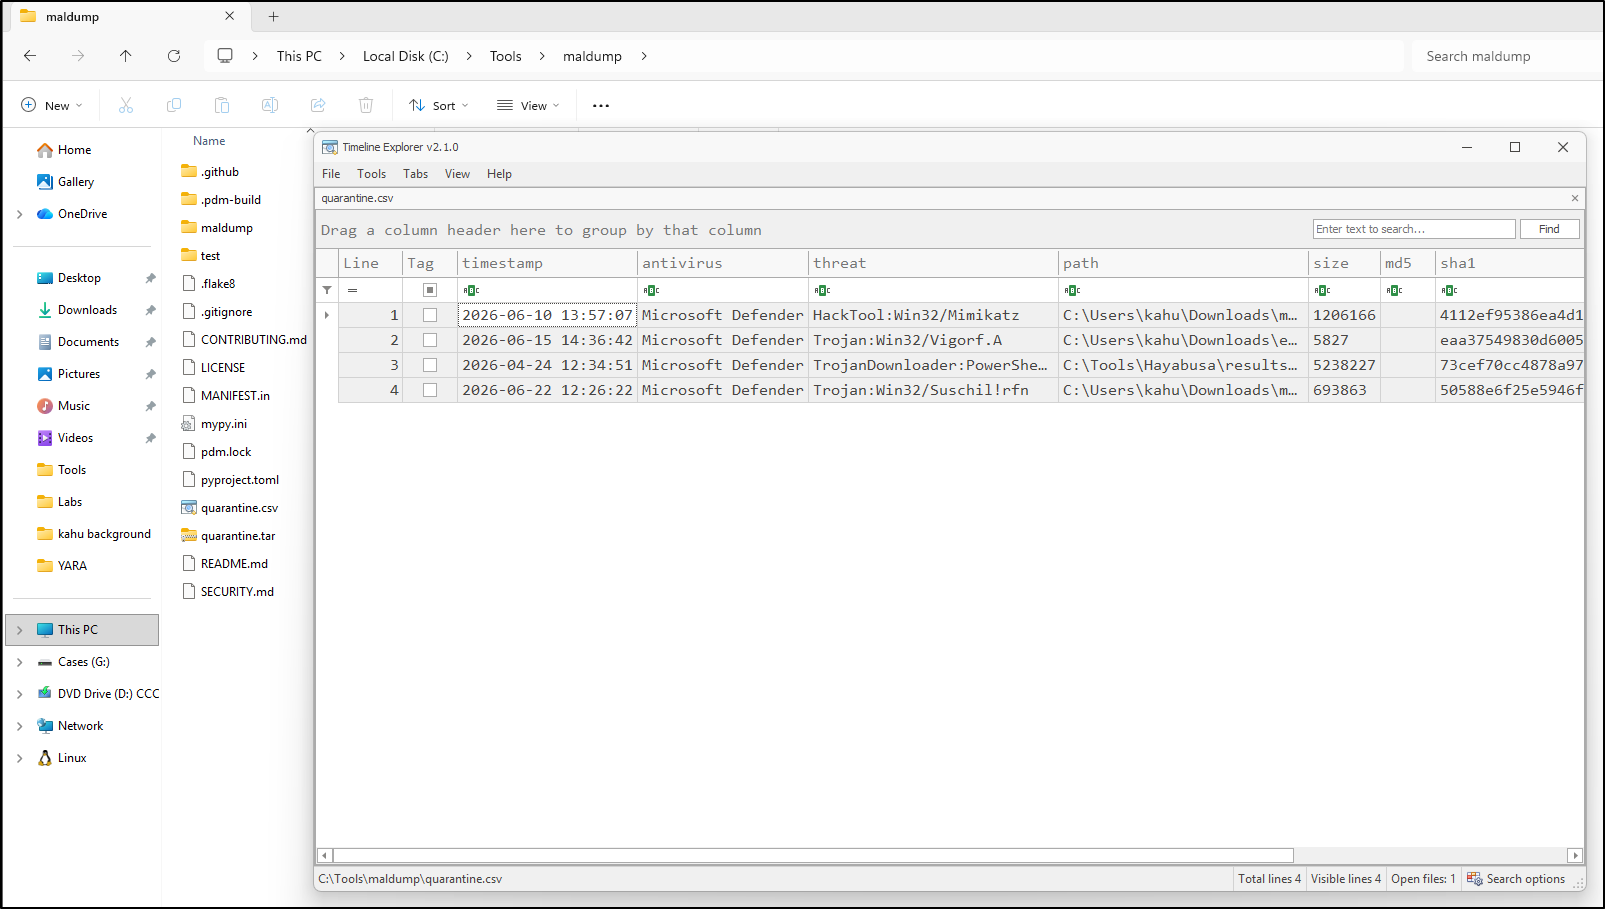
The quaraintine.csv file can be opened in Timeline Explorer and it contains quarantine metadata.